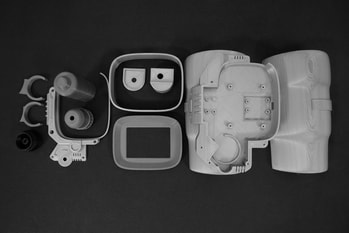
3D Printing by Ruiz Brothers Parts & Materials Download and 3D print the parts in your desired colored filament. We recommend PLA filament, to minimize warping and splitting. If you don't have access to a 3D printer, you can use a service like 3DHubs.com Part Orientation The parts are oriented to print "as-is". Only two parts require support material. We tested this parts on the Flashforge Creator Pro and Ultimaker 2. armband.stl base-cover.stl base-main.stl Add support material bat-cap.stl bat-case.stl bat-clip-a.stl bat-clip-b.stl LED-diffuser.stl LED-ring.stl rotary-case.stl Add support material rotary-cover.stl rotary-knob.stl screen-cover.stl screen-visor.stl Download STL sModify Design The parts were designed in Autodesk Fusion 360. The design file is open source available to download and customize - It can be downloaded in various formats such as IGS, STEP, SAT and many others.
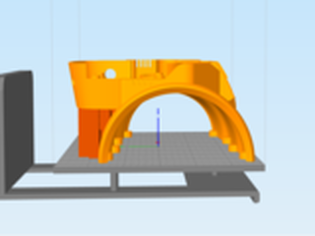
Download Source Custom Supports When slicing the parts in your preferred slicing program, you'll need to apply support material. Simplify3D has a nifty feature that lets you apply custom supports to specific areas in the part. This helps save on material and print time. The base-mainpart doesn't require support in the middle of the armband - only the overhand areas in the back and triangular flap. Parts Cleanup When the parts are finished printing, you may need to clean them up a bit. Remove the support materials using a pair of flat pliers. A pair of flush diagonal snips can help remove any string or bits.
Tap Standoffs First up, it's a good idea to tap all of the standoffs in the base-main part. Use a #4-40 tap or machine screws to create the necessary threads. Don't fasten the tap/screw all the way through - just until its about halfway through the standoff.
Add Magnets The armband and base-mainparts will be held together with rare earth magnets. On the bottom of the parts are 8 pockets – this is where the magnets will go. Insert one magnet in all the pockets to test tolerances – If they're too tight, use a hobby knife or filing tool to loosen it up. A helpful tip is to mark one of the ends with a sharpie - that way you can keep track of the polarities. I recommend using E6000 adhesives to glue the magnets in place. Drop just a dap of glue into the pocket and insert one magnet at a time. Make sure to keep anything metal at arms reach – My watch band has metal and it pulled out one of the magnets before it fully dried, so be cautious! Be sure give the adhesives 3-4 hours to fully cure before handeling them.
Glue Screen Visor to Base Cover Next up, we'll need to glue the screen-visor to the base-coverpart. Notice the cutout on the visor part - this will allow accessibility to the ports on the Raspberry Pi. Orient the visor so the cutout is lined up with the opening on the base-cover part. Lay the screen-visor on top of the base-cover. It should nicely fit flush with the part. Once you are familiar with the correct orientation, glue the two parts together. Again, be sure to let the parts dry for several hours before handeling. Prep Work That's about all the prep work we need to do for the printed parts. In this tutorial, we won't go over any finishing or painting techniques to the parts, but you're totally welcome to do that yourself. While the parts dry, let's go ahead and get the Raspberry Pi software ready.